Documentation Home Page ◇ HYPERSIM Home Page
Pour la documentation en FRANÇAIS, utilisez l'outil de traduction de votre navigateur Chrome, Edge ou Safari. Voir un exemple.
ScopeView | Signals Form Menu, Data Source Chooser & Signal Selection
- Sylvain Ménard
On this page:
In this section:
- ScopeView | View Menu
- ScopeView | Data Source Menu
- Scopeview | Comtrade Combiner
- ScopeView | Graph Menu
- ScopeView | Signal Processing
- ScopeView | Templates
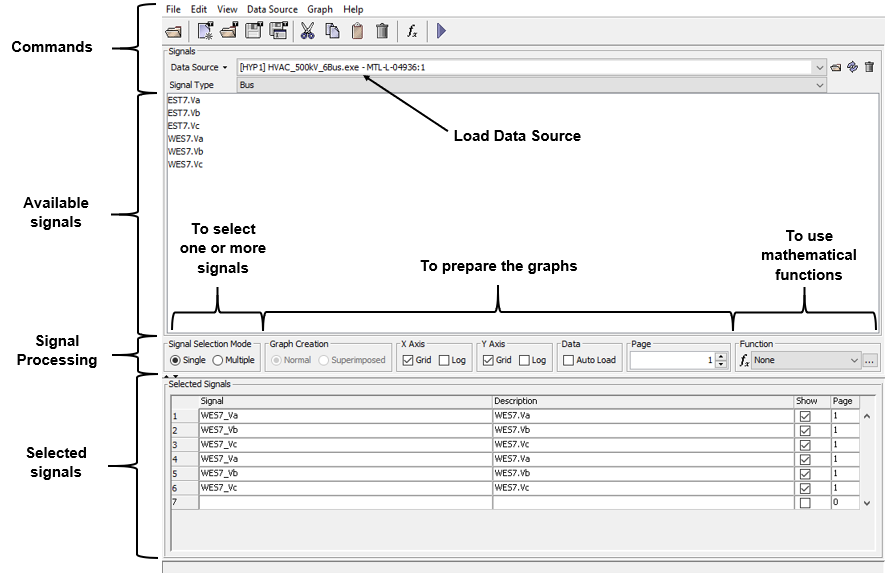
Users must configure a series of items before starting data acquisition. For example, you must select the signals to acquire, the corresponding mathematical operations to perform, and specify the number of acquisitions.
From the Signals Form below, four areas are accessible:
- The Command buttons area
- The Available signals listing area
- The Signal processing options
- The Selected signals listing area
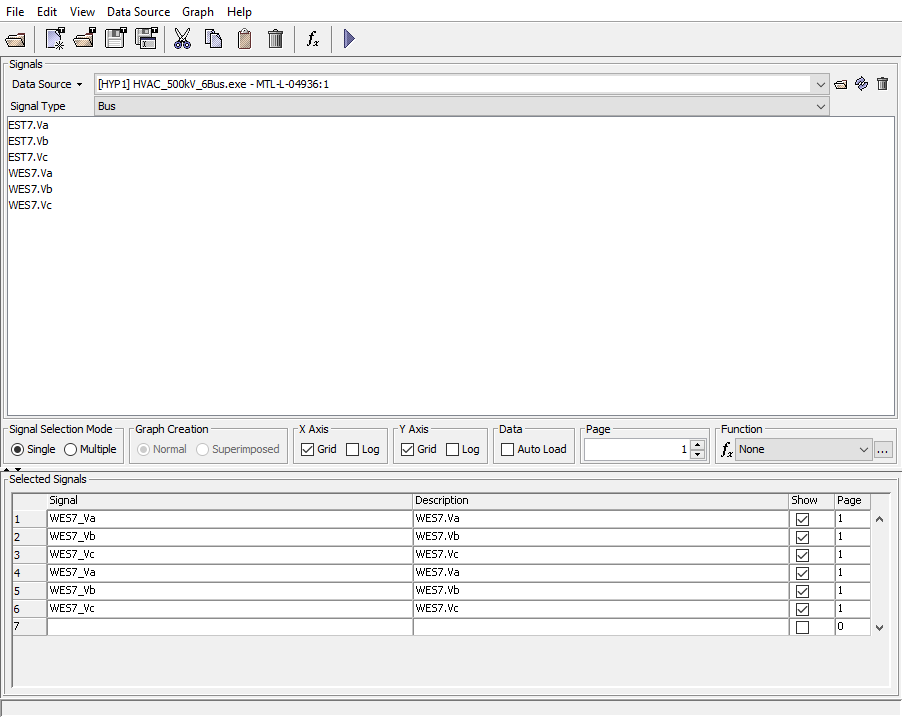
Signals Form Menus
In the following figure, the File and Edit menus have the same functions as already described.
Data Source Chooser and Signal Selection
Users can select various data sources through the Data Sources Chooser dialogue found in the Data Source menu.
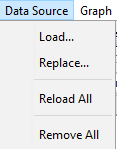
Clicking Data Source > Load opens the Data Sources Chooser dialogue.
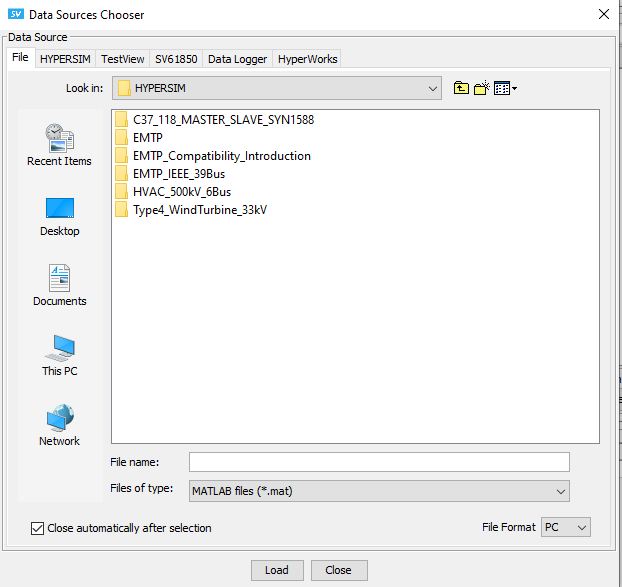
Users can choose from the following options, shown below:
- A File, to which they'll navigate
- A HYPERSIM source
- A TestView source
- A SV61850 source
- A DataLogger source
- A HyperWorks source
Data Source Chooser > File
ScopeView can acquire data from many source types. Browse these if required through Data Source Chooser > File > Files of type.

| EMTP (*.m, *.pl4) | The EMTP source imports signals saved previously in an .m, or .pl4, file, generated by the EMTP simulation software |
|---|---|
| MATLAB (*.mat) |
|
| COMTRADE (*.cfg, *.cff) | The COMTRADE source imports signals saved previously in a .cfg or .cff file generated under the COMTRADE format |
| SPREADSHEET (*.txt, *.csv) | SPREADSHEET exports files of types .csv (comma-separated variables) or .txt (plain text), usually exported from Excel |
| PSCAD files (*.inf) | PSCAD imports .inf files |
| OPAL-RT DATA RECORD files (*.oprec) | OPAL-RT DATA RECORD files import OPAL-RT data recording files with the suffix .oprec. |
| SMCT files | The Transformer Switching Control System is an internal file format used by Hydro Quebec. |
To load previously saved sources, click the file you want:
- Select the signal type tab (EMTP, Matlab, etc.)
- Select the file format for the type of work station you are using, PC or UNIX
- Click the Load button. (The Load button moves the files to the area of the available signal.)
Data Source Chooser > HYPERSIM
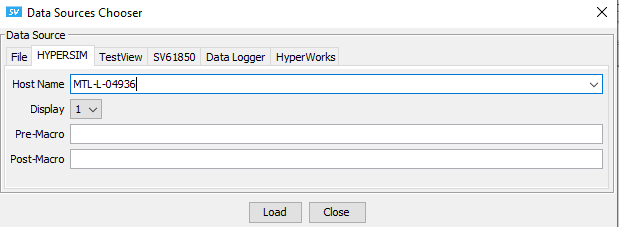
When using the HYPERSIM option of the Data Source Chooser dialogue:
- Select the Host Name from the pull-down
- Select the Display from the pull-down
- Enter any Pre-Macro or Post-Macro required in the corresponding text boxes
- Click Load to load the HYPERSIM data source
Data Source Chooser > TestView
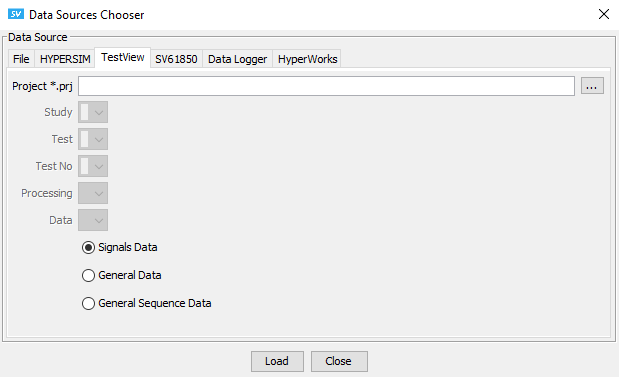
When using the TestView option of the Data Source Chooser dialogue:
- In the Project text box, enter the TestView Project name that will precede .prj or navigate, using the ellipses (...) to the project
- Where applicable, select options from the Study, Test, Test No, Processing and Data pull-downs
- Ensure that you have selected one of the three options: Signals data, General data, or General sequence data
- Click Load to load the TestView data source
Data Source Chooser > SV61850
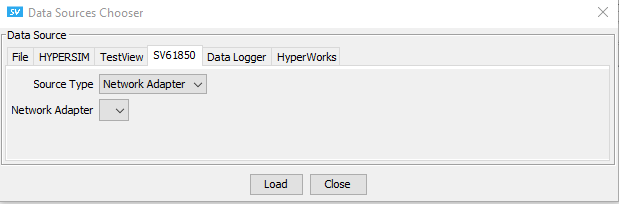
When using the SV61850 option of the Data Source Chooser dialogue:
- Choose a Source Type from the pull-down
- If you choose Network Adapter, you are required to choose a Network Adapter from the pull-down below
- If you choose TCP Dump File, either enter a name in the text box, or navigate, using the ellipses (...) to the TCP dump file
- Click Load to load the SV61850 data source
Data Source Chooser > DataLogger
See also: FPGA Scope
HYPERSIM provides a feature called the DataLogger so users can record data over a period of time during the simulation. A DataLogger can have various acquisition groups, each of them with different settings.
The settings defined in each group define when data are recorded and the duration of the acquisition.
The user can also use ScopeView to:
- View the data recorded using the DataLogger after the simulation
- View the data recorded during the simulation
For Option 1, a data source must be added to ScopeView by opening a file.
|
For a live stream of data (Option 2):
|
The data acquisition system records consecutive frames according to the settings of the DataLogger. For example, the Duration/Frame size allows users to determine a continuous period of time where data are recorded without any data loss.
Note that based on hardware bandwidth constraints between frames, there is no guarantee that the frames are consecutive without any blind zones. Users will need to try various settings for maximum simulation fidelity and minimum blind zones.
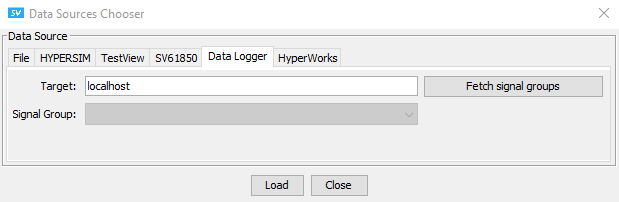
This dialogue, above, helps users select one signal group. The Target field is the name of the simulator where HYPERSIM is running a simulation.
- From the ScopeView main menu interface, select File > Open Data Source File or CTRL + O
- In the Target field, enter the name or IP address for the Target desired
- Click Fetch Signal Groups, and note the Signal Group dropdown dialogue is populated with all available signal groups for the listed target.
- Click Load to establish the connection with the running simulation
Data Source Chooser > HyperWorks
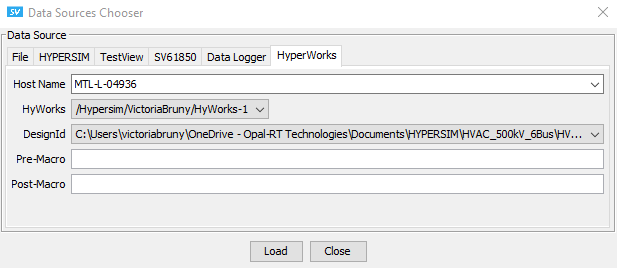
When using the HyperWorks option of the Data Source Chooser dialogue:
- Select the Host Name from the pull-down
- Select the HyWorks from the pull-down
- Select the DesignId from the pull-down
- Enter any Pre-Macro or Post-Macro required in the corresponding text boxes. (these options will be available from 2021.1)
- Click Load to load the HYPERSIM data source
Data Source > Signal Selection
- Below the loaded Data Source box is the Signal Type identification.
- From the pull-down list, select the type of signal you want to study. The list corresponds to the sensors installed in your simulation software or the usable Database.
- Users can select files from the Loaded Data Source box (scroll-down-list) in order to display or delete them.
- Users can also remove a single file or Remove All the files from the list and, finally the user can reload all or replace a file.
- Remember, it is possible to study signals from two or more different sources at the same time.
Note that users can select only one signal group per Chooser dialogue at one time.
If you'd like to switch signal sources, you can do any of the following:
- Use the Replace Source dialogue (not a part of this functionality)
- If you want to add a 2nd or 3rd signal group as a source, you can re-enter this dialog and perform the steps above another time, this time selecting a different signal group
- Users are not required to click the Fetch Signal Group button more than once unless a new source is present: all this does is refresh the drop-down list
- Sources can be deleted, as with any other source type
OPAL-RT TECHNOLOGIES, Inc. | 1751, rue Richardson, bureau 1060 | Montréal, Québec Canada H3K 1G6 | opal-rt.com | +1 514-935-2323
Follow OPAL-RT: LinkedIn | Facebook | YouTube | X/Twitter